A broken car antenna cable can lead to frustrating static and poor radio reception. Fortunately, fixing this issue is often a straightforward DIY project. This comprehensive guide will equip you with the knowledge and steps needed to diagnose and fix your broken car antenna cable, getting you back to enjoying crystal-clear radio in no time. You might be surprised how easy it is to restore your car’s radio to its former glory.
If you’ve ever wondered how to restore your car’s sound system, check out this guide on how to fix stereo in car.
Diagnosing the Problem: Is it Really the Cable?
Before diving into repairs, confirm the antenna cable is the culprit. Static alone isn’t definitive proof. Try these steps to pinpoint the issue:
- Check the Head Unit: Ensure your car stereo is functioning correctly. Try a different audio source like a CD or Bluetooth. If these work fine, the problem likely lies with the antenna or its cable.
- Inspect the Antenna Mast: Look for physical damage to the antenna mast itself. A bent or broken mast can disrupt signal reception.
- Examine the Cable Connections: Carefully inspect the cable connections at both the antenna and the head unit. Look for loose connections, corrosion, or damage.
Gathering Your Tools and Materials
Once you’ve confirmed the antenna cable is the problem, gather these tools:
- Replacement Antenna Cable: Purchase a cable compatible with your car model.
- Screwdrivers: You’ll need various sizes and types depending on your car’s interior panels and stereo mounting.
- Panel Removal Tools: These plastic tools help prevent damage when removing interior panels.
- Electrical Tape: Useful for securing connections and insulating exposed wires.
- Wire Strippers/Cutters (if necessary): For splicing or repairing a damaged cable section.
How to Fix a Broken Car Window: A Step-by-Step Guide to Replacing the Antenna Cable
Replacing a broken antenna cable typically involves these steps:
- Disconnect the Battery: This crucial safety step prevents electrical shocks and protects your car’s electrical system.
- Access the Antenna and Head Unit: Remove any necessary interior panels to access the antenna base and the back of your car stereo.
- Detach the Old Cable: Carefully disconnect the antenna cable from both the antenna and the head unit. Note how it was routed for easier installation of the new cable.
- Route the New Cable: Follow the path of the old cable, securing it with clips or ties as needed.
- Connect the New Cable: Firmly attach the new cable to both the antenna and the head unit.
- Reassemble the Interior: Carefully replace all removed panels, ensuring they fit snugly.
- Reconnect the Battery: Once everything is back in place, reconnect the battery.
- Test the Radio: Turn on the radio and check for improved reception.
Repairing a Damaged Cable Section
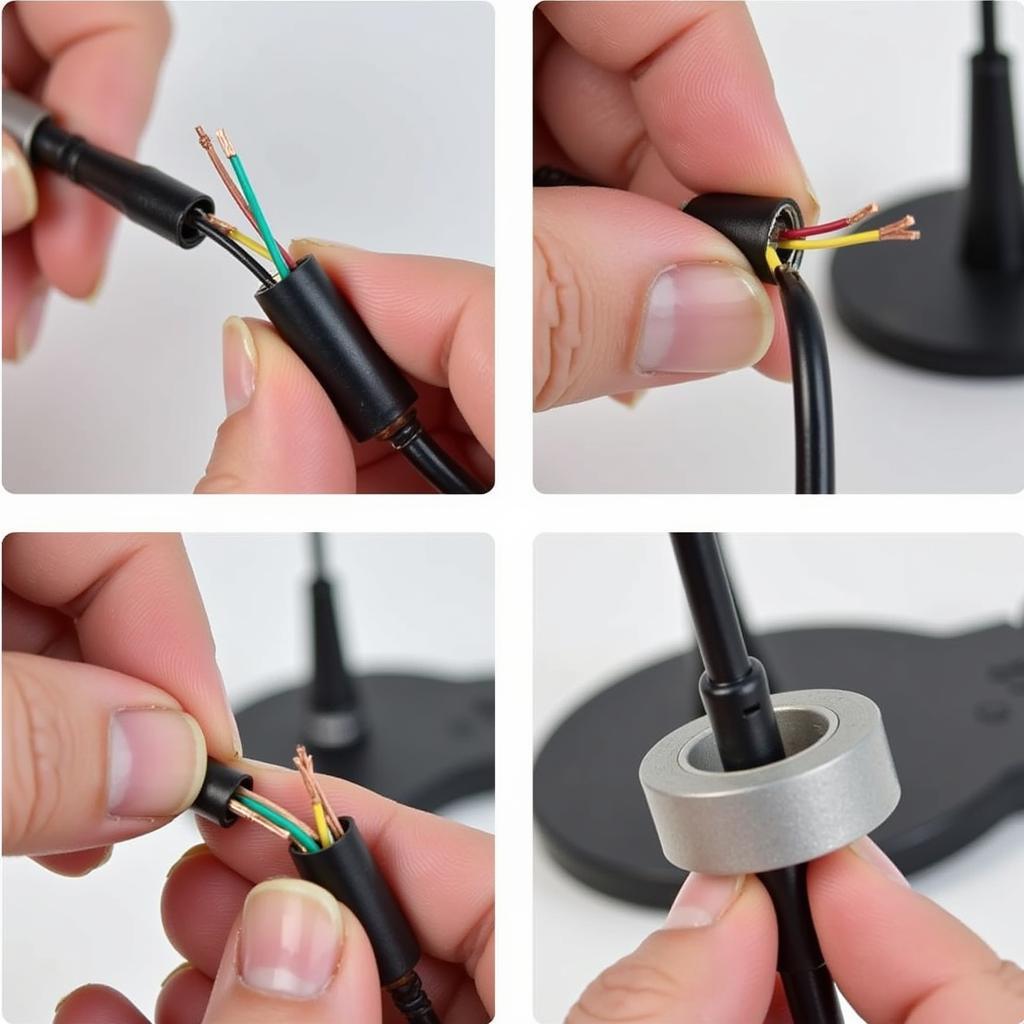
If the cable is only partially damaged, you may be able to repair it instead of replacing the entire cable. This involves:
- Locate the Damage: Pinpoint the exact location of the break or cut in the cable.
- Prepare the Cable: Cut out the damaged section, leaving enough wire on either side for splicing.
- Splice and Insulate: Carefully strip the insulation from both ends of the cut cable and splice the wires together using a suitable connector or soldering. Thoroughly insulate the splice with electrical tape.
If you’re dealing with a shattered car window, knowing how to fix a broken car window is essential. Also, understanding how much to fix a shattered car window can help you budget accordingly.
 Splicing Damaged Car Antenna Cable
Preventing Future Damage
- Regular Inspection: Periodically check your antenna cable for signs of wear and tear, especially at connection points.
- Proper Routing: Ensure the cable is routed securely to avoid snags or pinching.
- Careful Handling: Avoid pulling or stressing the cable during installation or other maintenance tasks.
“A little preventative maintenance goes a long way,” says automotive expert, David Miller, ASE Certified Master Technician. “Regularly checking your antenna cable can save you from headaches down the road.”
Conclusion
Fixing a broken car antenna cable is a manageable DIY project that can significantly improve your radio reception. By following the steps outlined in this guide, you can quickly diagnose the problem, gather the necessary tools, and either replace or repair the cable. With a bit of patience and attention to detail, you’ll be back to enjoying clear radio in no time. If you need further assistance or prefer to have a professional handle the repair, feel free to connect with us at AutoTipPro. Our phone number is +1 (641) 206-8880, and our office is located at 500 N St Mary’s St, San Antonio, TX 78205, United States. We’re here to help!


Leave a Reply