Scratches on your car are an unfortunate reality, whether from errant shopping carts, careless drivers, or unexpected road debris. While a scratch might feel like a major blemish, most minor scratches can be fixed at home with the right tools and techniques. This comprehensive guide will walk you through how to identify the severity of the scratch, the necessary materials, and step-by-step instructions to Fix Scratches On Cars yourself.
Assessing the Damage: What Kind of Scratch Is It?
Before you start gathering materials, it’s crucial to assess the severity of the scratch.
-
Clear Coat Scratch: This is the most superficial type of scratch, affecting only the clear coat layer that protects your car’s paint. These scratches often appear as light, white marks and can usually be buffed out.
-
Paint Scratch: A paint scratch goes deeper than the clear coat, reaching into the colored paint layer. You’ll see the actual color of your car in the scratch. These scratches require more attention and might involve touch-up paint.
-
Deep Scratch: Deep scratches cut through the paint and primer, sometimes even reaching the bare metal. These scratches require more involved repairs to prevent rust and require professional attention.
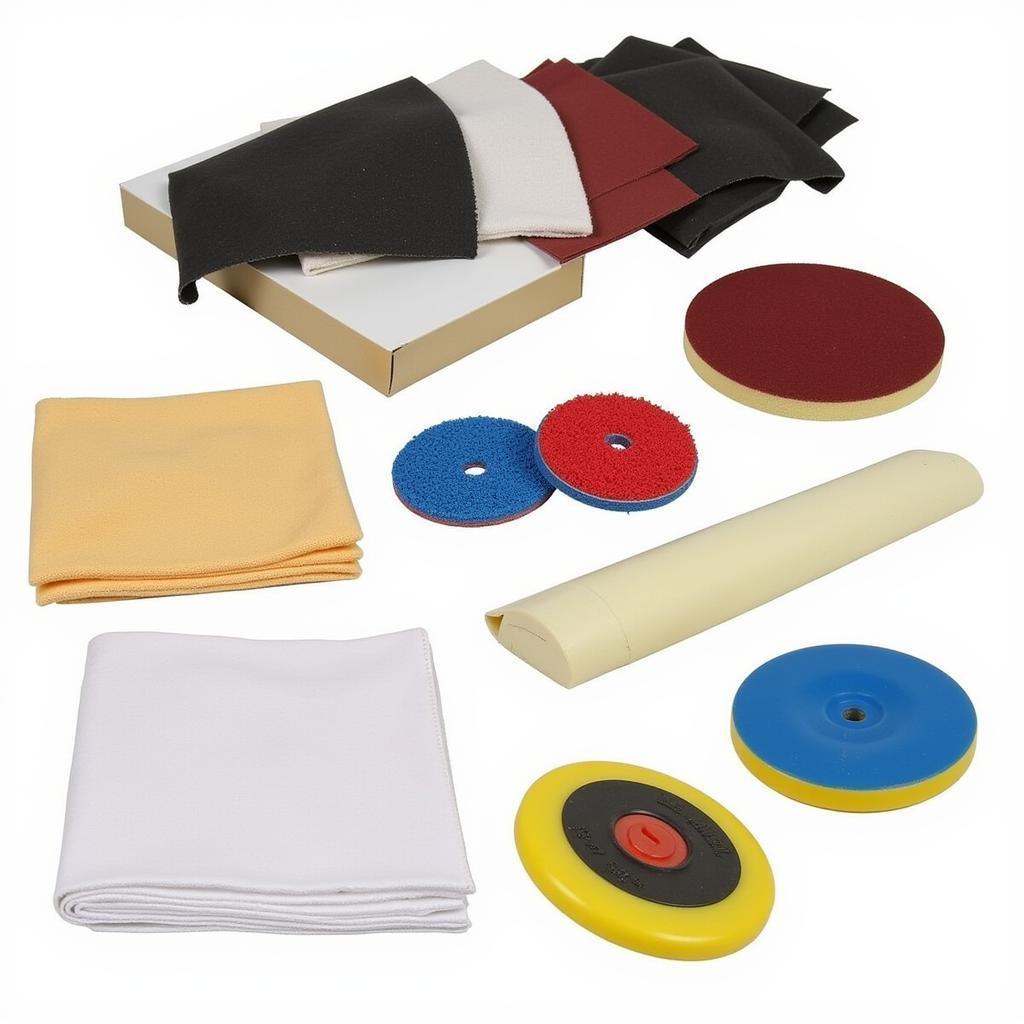
 Car Scratch Repair Kit
For the purpose of this guide, we’ll focus on fixing clear coat and minor paint scratches. Deeper scratches are best left to professionals to ensure proper repair and prevent further damage.
Gathering Your Tools and Materials
To fix scratches on cars, you’ll need:
- Car Wash Supplies: Soap, water, bucket, microfiber wash mitt, and drying towels.
- Masking Tape: To protect surrounding areas while you work.
- Sandpaper: For clear coat scratches, use 2000-grit or higher. For paint scratches, start with 1500-grit and move up to 2000-grit for finer sanding.
- Rubbing Compound: Removes scratches and imperfections.
- Polishing Compound: Restores shine and gloss to the paint.
- Applicator Pads: For applying rubbing and polishing compounds.
- Microfiber Cloths: For buffing and wiping.
Fixing a Clear Coat Scratch
-
Wash and Dry: Thoroughly wash and dry your car to remove any dirt, grime, or debris that could further scratch the paint during the repair process.
-
Inspect the Scratch: Look closely at the scratch in good lighting to determine its depth and length.
-
Sanding (Optional): If the scratch is slightly deeper than a superficial swirl mark, lightly sand the area with 2000-grit sandpaper. Use gentle, back and forth motions and avoid excessive pressure.
-
Apply Rubbing Compound: Put a small amount of rubbing compound onto a clean applicator pad. Work the compound into the scratch using circular motions, applying light pressure. Wipe away any excess with a microfiber cloth.
-
Polish: Apply a polishing compound using the same technique as the rubbing compound to restore shine and blend the repaired area with the surrounding paint.
-
Inspect and Repeat: Examine the scratch in the light. If the scratch is still visible, repeat steps 4-5.
Fixing a Minor Paint Scratch
Dealing with scratches on interior panels? Learn how to fix scratches on interior panels of your car.
-
Clean the Area: Wash and dry the scratched area.
-
Mask Off the Area: Use masking tape to protect the surrounding paint from accidental sanding or compound application.
-
Sand the Scratch: Start with 1500-grit sandpaper, using gentle, back and forth strokes. Gradually increase the grit to 2000 or higher until the scratch is less visible.
-
Clean the Area: Wipe away any sanding residue with a microfiber cloth.
-
Apply Touch-Up Paint (If Necessary): For deeper paint scratches, you might need to apply touch-up paint. Use a very fine brush or a toothpick to dab a small amount of paint onto the scratch, ensuring it’s level with the surrounding paint. Let it dry completely.
-
Apply Rubbing Compound: Use a clean applicator pad to apply rubbing compound over the sanded and/or touch-up paint area. Work in circular motions, gradually reducing pressure. Wipe away excess compound.
-
Polish: Finish by applying a polishing compound using the same technique as the rubbing compound. This will restore shine and blend the repaired area.
Expert Insights
“Many car owners underestimate the importance of proper car care in preventing scratches,” says John Miller, an experienced automotive detailer. “Regular washing and waxing create a protective layer on your car’s paint, making it less susceptible to minor scratches.”
When to Seek Professional Help
While DIY fixes are suitable for minor scratches, there are instances where professional help is necessary:
-
Rust: If you see any signs of rust, it’s crucial to address it immediately to prevent further damage.
-
Deep Scratches: Scratches that expose bare metal need immediate professional attention to prevent rust and ensure a proper repair.
-
Extensive Damage: If the scratch covers a large area or if you’re uncomfortable with the DIY approach, it’s best to consult a professional.
Thinking about selling your car instead of fixing it? We’ve got you covered! Find out how to sell a car that’s not worth fixing.
Conclusion
Fixing scratches on your car doesn’t have to be a daunting task. By understanding the type of scratch and following the right steps, you can restore your car’s appearance with simple DIY techniques. Remember, patience and attention to detail are key to achieving a seamless repair.
For all your car repair and maintenance needs, contact AutoTipPro at +1 (641) 206-8880 or visit our office at 500 N St Mary’s St, San Antonio, TX 78205, United States.
FAQs
1. Can I use toothpaste to fix car scratches?
While toothpaste is often touted as a home remedy, it’s not recommended for car scratches. Toothpaste is abrasive and can cause more harm than good to your car’s paint.
2. How often should I wax my car?
Waxing your car every three months provides a protective layer that can help prevent and minimize scratches.
3. Can I use rubbing compound on my entire car?
It’s not advisable to use rubbing compound on your entire car unless you’re experienced with detailing. Rubbing compound is abrasive and can dull the paint if not used correctly.
4. How much does it cost to fix a car dent?
The cost to fix a car dent varies depending on the dent’s size and location. Find out more about the cost of fixing a car dent.
5. Can I fix scratches on my car’s plastic bumper?
Yes, you can fix scratches on plastic bumpers using similar techniques but with products specifically designed for plastic surfaces.
6. How much does a damaged car door cost to fix?
The cost to fix a damaged car door depends on the extent of the damage. Learn more about the cost to fix a damaged car door.


Leave a Reply