The Honda CR-V is a popular SUV known for its reliability and fuel efficiency. However, like any vehicle, it can experience brake system problems. This guide will help you identify common Honda CR-V brake issues, understand their causes, and learn about possible solutions. Whether you’re a car owner, a mechanic, or a technician, this article will provide you with valuable insights into resolving Honda CR-V brake system problems.
Understanding Brake System Components
Before we delve into specific problems, it’s essential to understand the key components that make up a brake system:
- Brake Pads: These friction materials are pressed against the brake rotors to slow down the vehicle.
- Brake Rotors: These metal discs are attached to the wheels and provide a surface for the brake pads to grip.
- Brake Calipers: These mechanisms hold and move the brake pads against the rotors.
- Brake Lines: These tubes carry brake fluid from the master cylinder to the calipers.
- Master Cylinder: This component converts hydraulic pressure from the brake pedal into force that acts on the calipers.
- Brake Fluid: This special fluid transmits the force from the master cylinder to the calipers.
Common Honda CR-V Brake System Problems
Here are some of the most frequently encountered brake problems in Honda CR-V vehicles:
1. Brake Squealing or Grinding Noise
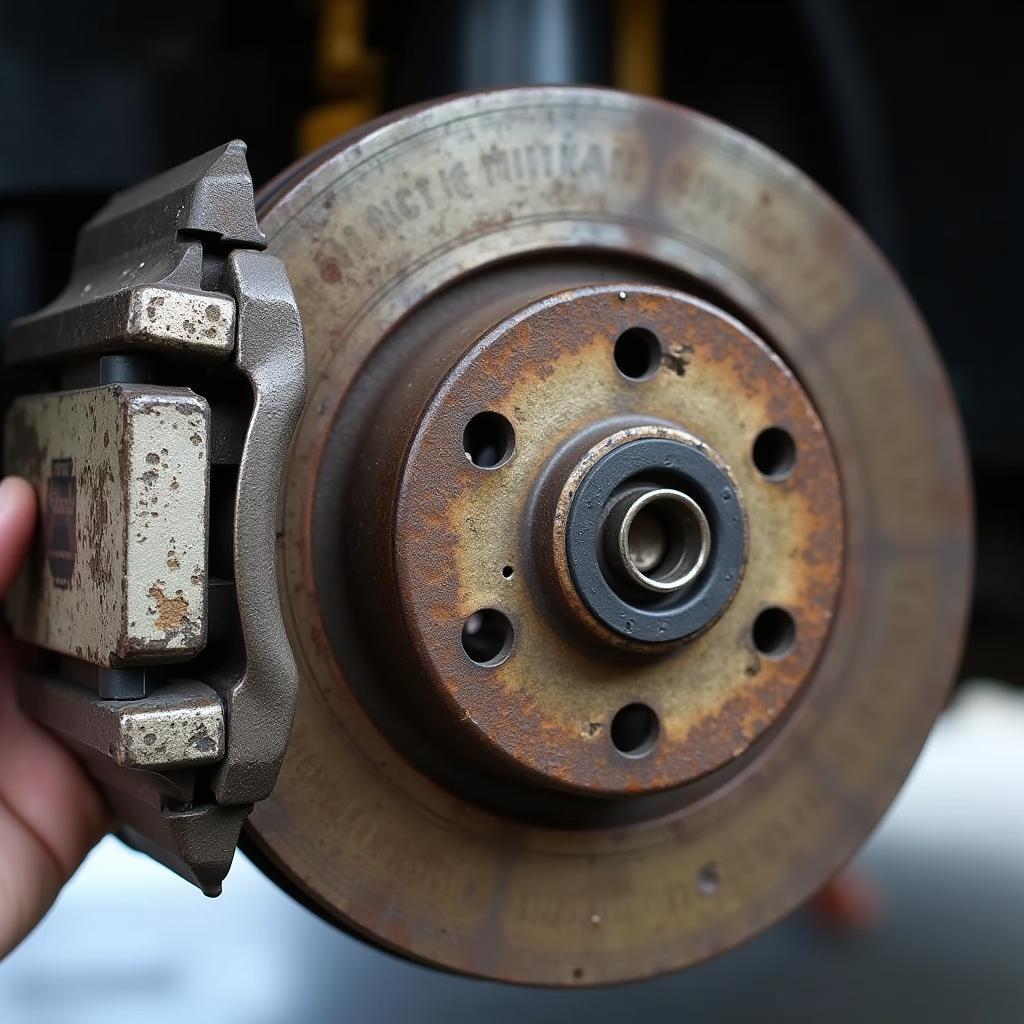
 Squealing or Grinding Noise from Honda CR-V Brake Pads
This is a common problem, often caused by worn-out brake pads or rotors. As the pads wear down, the metal backing plates begin to rub against the rotors, creating a high-pitched squealing sound. Grinding noise indicates that the brake pads have worn down completely and the metal backing plates are scraping against the rotors, which can damage the rotors.
What to do: If you hear squealing or grinding noises, it’s essential to have your brake pads and rotors inspected by a professional as soon as possible.
2. Brake Pedal Feels Soft or Spongy
A soft or spongy brake pedal usually indicates a problem with the brake fluid level or hydraulic system.
- Low Brake Fluid: If the brake fluid level is low, it can lead to a soft brake pedal because the hydraulic pressure is insufficient.
- Leaking Brake Lines: A leak in the brake lines can cause a loss of brake fluid and a soft brake pedal.
- Damaged Master Cylinder: A faulty master cylinder may not be able to generate enough hydraulic pressure, resulting in a soft brake pedal.
What to do: Have your brake system checked by a qualified mechanic. They will inspect for leaks, check the brake fluid level, and assess the condition of the master cylinder.
3. Brake Pedal Goes to the Floor
This is a serious problem and indicates a significant issue with the brake system. It could mean:
- Complete Brake Fluid Loss: A large leak in the brake lines or a damaged master cylinder could cause a complete loss of brake fluid, making the brake pedal go to the floor.
- Air in the Brake Lines: Air trapped in the brake lines can compress under pressure, making the brake pedal feel spongy or go to the floor.
What to do: If your brake pedal goes to the floor, immediately pull over to a safe location and call for professional assistance. Do not attempt to drive the vehicle until the brake system has been repaired.
4. Uneven Brake Wear
If you notice that one or more brake pads are wearing down faster than the others, it might be due to a problem with the calipers.
- Sticking Caliper: A sticking caliper piston can prevent the brake pad from retracting fully, causing uneven wear on the pad.
- Faulty Caliper Piston: A damaged caliper piston can prevent the brake pad from moving freely, leading to uneven wear.
What to do: Get your brake calipers inspected by a mechanic to diagnose the cause of uneven wear and repair any faulty components.
5. Vibrations or Pulsating When Braking
Vibrations or pulsating sensations during braking can indicate a problem with the brake rotors.
- Warped Rotors: Warped rotors can cause vibrations and uneven brake pad wear. Warped rotors are often caused by excessive heat, improper installation, or age.
- Damaged Rotors: Damaged rotors with cracks or grooves can also cause vibrations when braking.
What to do: A qualified mechanic can inspect your brake rotors for warping or damage and recommend either resurfacing or replacement if necessary.
Troubleshooting and Repairing Honda CR-V Brake System Problems
1. Visual Inspection
The first step in troubleshooting a Honda CR-V brake system problem is a visual inspection. Look for:
- Leaking brake fluid: Check for any signs of brake fluid leaks around the master cylinder, calipers, or brake lines.
- Worn brake pads: Inspect the brake pads for wear and tear. Look for metal backing plates, thin pad material, or uneven wear.
- Damaged brake rotors: Check for warping, cracks, or grooves on the brake rotors.
- Loose or damaged components: Inspect the brake lines, calipers, and other components for any signs of looseness or damage.
2. Brake Fluid Level Check
Always check the brake fluid level in the master cylinder reservoir. The level should be within the “full” mark on the reservoir. Low brake fluid level can cause a soft brake pedal and other brake problems.
3. Test Drive
A test drive can help you identify specific brake issues:
- Listen for noises: Pay attention to any squealing, grinding, or other unusual sounds during braking.
- Feel the brake pedal: Check for a soft, spongy, or hard brake pedal feel.
- Observe brake performance: Notice any vibration, pulsing, or uneven braking during the test drive.
4. Professional Diagnosis and Repair
If you cannot identify the cause of the problem or feel uncomfortable performing any repairs yourself, it’s essential to take your Honda CR-V to a qualified mechanic for a professional diagnosis and repair.
Expert Advice
“I’ve been working as a mechanic for over 20 years, and I always tell my customers that regular brake maintenance is crucial for their safety. Don’t wait until you hear noises or feel problems with your brakes. Have them inspected at least once a year or every 5,000 miles, whichever comes first.” – John Smith, Certified Automotive Technician**
“If you notice any brake issues, especially a soft or spongy brake pedal, don’t ignore them. These problems can worsen quickly and lead to dangerous situations on the road.” – Sarah Johnson, Certified Automotive Technician**
Conclusion
Addressing brake system problems in your Honda CR-V promptly is crucial for your safety and the longevity of your vehicle. By understanding the common brake system problems and troubleshooting steps outlined in this guide, you can effectively diagnose and address issues with your Honda CR-V’s brakes. Remember, if you’re unsure about any aspect of brake maintenance or repair, seeking professional assistance from a qualified mechanic is always recommended.
Need assistance with your Honda CR-V brake system? Contact us today!
Phone: +1 (641) 206-8880
Address: 500 N St Mary’s St, San Antonio, TX 78205, United States
FAQ
Q: How often should I have my Honda CR-V brakes inspected?
A: It’s recommended to have your brakes inspected at least once a year or every 5,000 miles, whichever comes first.
Q: What are the signs of worn-out brake pads?
A: You may hear squealing or grinding noises, notice uneven wear on the brake pads, or see the metal backing plates exposed.
Q: Can I replace my own brake pads?
A: Some people are comfortable replacing their own brake pads, but it’s a complex procedure that requires special tools and knowledge. If you’re not comfortable, it’s best to take your Honda CR-V to a qualified mechanic.
Q: How do I know if my brake rotors need to be replaced?
A: A mechanic can inspect your brake rotors for warping, cracks, or grooves. If they are warped or damaged, they need to be resurfaced or replaced.
Q: What is the difference between resurfacing and replacing brake rotors?
A: Resurfacing involves machining the rotor surface to remove any imperfections or warping. Replacing involves installing new rotors. The best course of action depends on the severity of the damage.


Leave a Reply