Discovering a cigarette burn on your car ceiling can be disheartening. Whether it’s a result of an accident or a previous owner, that unsightly mark can significantly impact the overall aesthetics and value of your car’s interior.
Fortunately, fixing a cigarette burn on your car’s ceiling is often easier than you might think. This comprehensive guide will walk you through various effective methods to help you restore your car’s interior to its former glory.
Assessing the Damage: How Bad is the Burn?
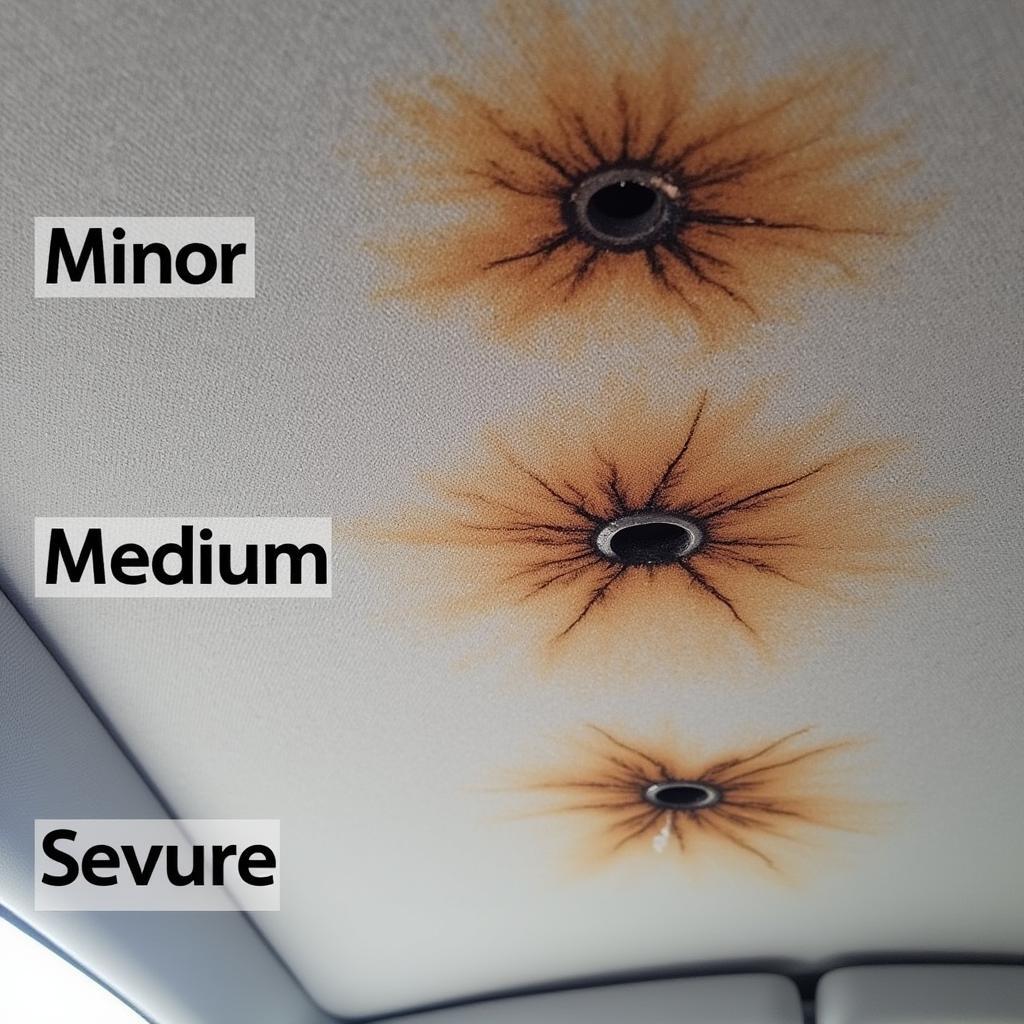
Before diving into the repair process, it’s essential to assess the extent of the damage. The approach you take will depend on the severity of the burn:
- Minor Burns: These are superficial burns that have only affected the fabric’s top layer. They often appear as small, discolored spots.
- Medium Burns: These burns have penetrated deeper into the fabric, potentially melting some fibers. You might notice frayed edges or a slight depression in the ceiling fabric.
- Severe Burns: These burns have significantly damaged the fabric, leaving a hole or a large, charred area. Repairing severe burns often requires more advanced techniques and materials.
 Car Ceiling Burn Severity Levels
DIY Solutions for Minor Cigarette Burns
For minor burns, you can often achieve impressive results using simple household items and a bit of patience. Here are two effective methods:
1. The Razor Blade Technique
- What you’ll need: A new razor blade, a soft cloth, a vacuum cleaner with a brush attachment.
- Instructions:
- Gently scrape the burned area with the razor blade, holding it at a slight angle. Be careful not to press too hard, as you only want to remove the charred fibers.
- Use the vacuum cleaner’s brush attachment to remove any loose fibers.
- Dampen the cloth with clean water and gently wipe the area to remove any residue.
- Allow the area to dry completely.
2. The Baking Soda Paste Method
- What you’ll need: Baking soda, water, a soft-bristled toothbrush, a clean cloth.
- Instructions:
- Create a paste by mixing a small amount of baking soda with a few drops of water.
- Apply the paste to the cigarette burn and gently scrub it in circular motions using the toothbrush.
- Wipe away the paste with the clean cloth and allow the area to dry thoroughly.
Addressing Medium Cigarette Burns
Medium burns require a slightly more involved approach. Here are two options:
1. Fabric Shaving and Matching Fabric Dye
- What you’ll need: Fabric shaver, matching fabric dye, small brush or sponge applicator, clean cloth.
- Instructions:
- Carefully use the fabric shaver to remove the burned fibers, working your way around the perimeter of the burn.
- Once the burned fibers are removed, use a small brush or sponge applicator to apply the matching fabric dye to the affected area.
- Allow the dye to dry completely before touching or using the vehicle.
Pro Tip from John Miller, Automotive Upholstery Expert: “When selecting a fabric dye, always test it on an inconspicuous area of your car’s ceiling first to ensure a perfect color match.”
2. Patching with Matching Headliner Fabric
- What you’ll need: Matching headliner fabric (check your car’s manual or contact the manufacturer), fabric adhesive, sharp scissors, a clean cloth.
- Instructions:
- Cut a small piece of headliner fabric slightly larger than the burn mark.
- Apply fabric adhesive to the back of the fabric patch and carefully place it over the burn, ensuring a smooth and seamless finish.
- Press firmly on the patch for a few minutes to ensure proper adhesion.
Handling Severe Cigarette Burns and Holes
Severe burns often necessitate professional repair. However, if you’re determined to tackle the issue yourself, consider these options:
1. Headliner Replacement
- What you’ll need: New headliner fabric, headliner adhesive, various tools (check online tutorials for specific tools).
- Instructions: Replacing a headliner is an advanced DIY project. It involves removing various interior trim pieces, detaching the old headliner, attaching the new fabric, and reinstalling the trim. Numerous online tutorials provide detailed instructions and visual guidance.
2. Professional Upholstery Repair
- Finding a Professional: Search for reputable automotive upholstery shops in your area. Request quotes and compare services to find the best fit for your needs and budget.
“While DIY repairs can be cost-effective, professional upholstery shops have the expertise and specialized tools to deliver seamless repairs, especially for severe burns,” advises Sarah Jenkins, owner of Auto Interior Solutions.
Conclusion: Reclaiming Your Car’s Pristine Interior
A cigarette burn on your car ceiling doesn’t have to be a permanent blemish. By following the methods outlined in this guide, you can effectively address burns of varying severities and restore your car’s interior to its former glory.
Need further assistance or expert advice on your car repair needs? Don’t hesitate to reach out to us at AutoTipPro! Call us at +1 (641) 206-8880 or visit our office at 500 N St Mary’s St, San Antonio, TX 78205, United States.
Frequently Asked Questions
1. Can I use super glue to fix a cigarette burn on my car ceiling?
While tempting, using super glue is not recommended as it can create a hardened, discolored area that’s difficult to conceal.
2. Will hairspray remove a cigarette burn from my car ceiling?
Unfortunately, hairspray is ineffective in removing or repairing cigarette burns. It might temporarily mask the discoloration, but the burn will reappear.
3. How much does it cost to have a cigarette burn professionally repaired?
The cost varies depending on the severity of the burn, the type of car, and the upholstery shop’s rates. Minor repairs can range from $50 to $150, while more extensive damage might cost several hundred dollars.
4. Can I use a home upholstery cleaning solution to clean the area around the burn?
While a mild upholstery cleaning solution is generally safe, always test it on an inconspicuous area first to ensure colorfastness.
5. What happens if the cigarette burn has damaged the car’s electrical components in the ceiling?
If you suspect damage to electrical components, it’s crucial to consult a qualified auto electrician immediately to address any potential safety hazards.


Leave a Reply