Plasti Dip is a popular, removable rubber coating used to customize car exteriors. While generally easy to apply and remove, using Plasti Dip can lead to unexpected issues if not done correctly. This guide will cover common Plasti Dip Car Problems, how to troubleshoot them, and offer solutions for a flawless finish.
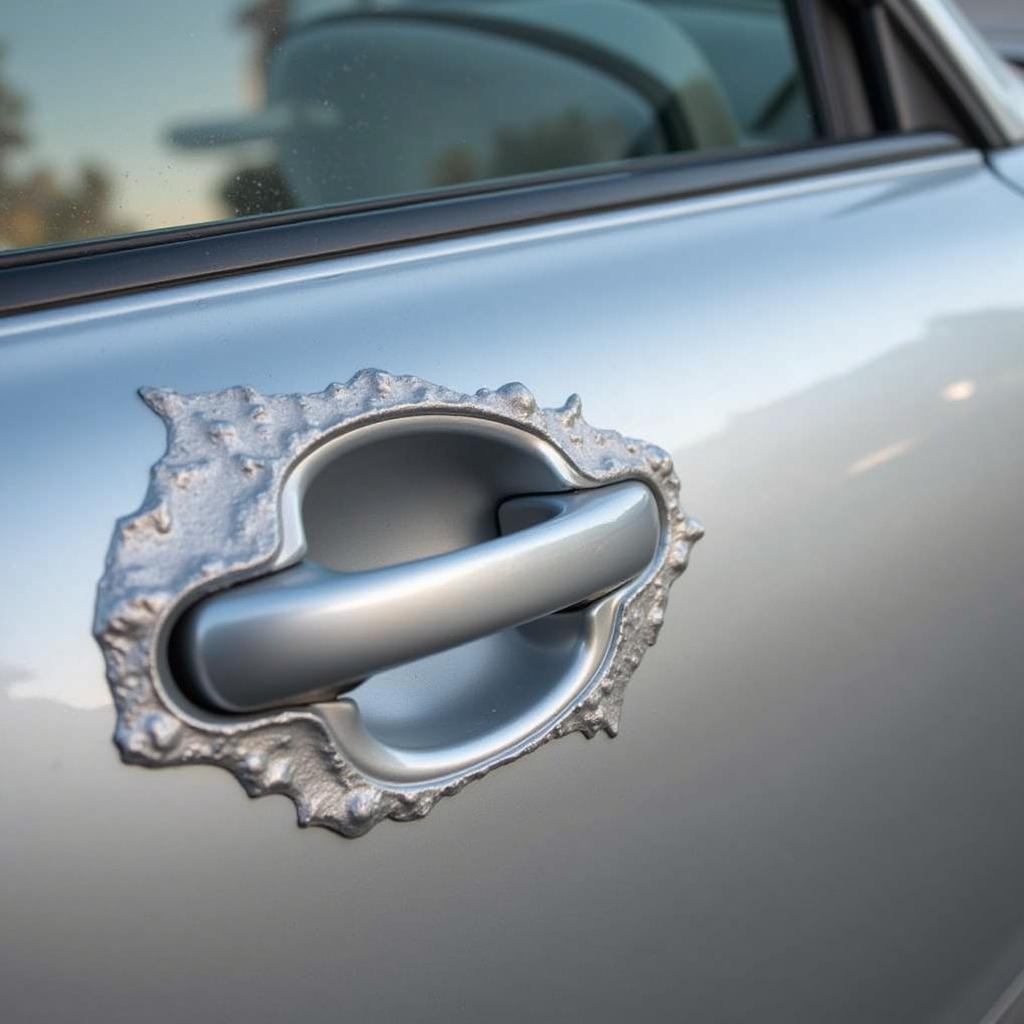
 Peeling Plasti Dip on Car Door Handle
Common Plasti Dip Car Problems and Solutions
Before diving into specific issues, it’s crucial to understand that most Plasti Dip car problems stem from inadequate surface preparation or improper application techniques. Let’s explore some common problems and their solutions:
1. Plasti Dip Peeling or Chipping
Peeling is a common issue, often occurring around edges or high-contact areas like door handles.
Possible Causes:
- Insufficient Cleaning: Dirt, wax, or grease on the surface prevent the Plasti Dip from properly adhering.
- Inadequate Drying Time: Applying Plasti Dip on a damp surface traps moisture, leading to peeling.
- Thin Coats: Applying Plasti Dip too thinly makes it prone to chipping and peeling.
Solutions:
- Thorough Cleaning: Before applying Plasti Dip, clean the surface with soap and water, followed by a degreaser and isopropyl alcohol. Allow it to dry completely.
- Proper Drying: Ensure the surface is completely dry before applying Plasti Dip. If necessary, use a heat gun or hairdryer on a low setting to speed up the drying process.
- Multiple Coats: Apply at least five to seven coats of Plasti Dip, allowing adequate drying time between each coat.
2. Plasti Dip Orange Peel Texture
An orange peel texture occurs when the Plasti Dip dries with a rough, uneven surface resembling an orange peel.
Possible Causes:
- Spray Gun Distance: Holding the spray gun too far or too close to the surface can result in uneven coating.
- Incorrect Spray Gun Pressure: Using incorrect air pressure can lead to improper atomization of the Plasti Dip.
- Environmental Factors: High humidity or low temperatures can affect the drying process and cause an orange peel texture.
Solutions:
- Optimal Spray Gun Distance: Hold the spray gun 6-8 inches away from the surface for even coverage.
- Adjust Spray Gun Pressure: Refer to the Plasti Dip instructions for the recommended air pressure for your specific spray gun.
- Control Environmental Factors: Avoid applying Plasti Dip in extreme temperatures or high humidity. If necessary, use a portable spray booth or work in a controlled environment.
3. Plasti Dip Fading or Discoloration
While Plasti Dip is designed to resist fading, prolonged exposure to UV rays and harsh weather can cause discoloration over time.
Possible Causes:
- UV Exposure: Prolonged exposure to sunlight can fade the color of the Plasti Dip.
- Improper Cleaning Chemicals: Using harsh chemicals or abrasive cleaners can damage the Plasti Dip and cause discoloration.
Solutions:
- UV Protection: Apply a UV protectant spray specifically designed for Plasti Dip to shield it from harmful UV rays.
- Gentle Cleaning: Use a mild car wash soap and a soft microfiber cloth to clean the Plasti Dip. Avoid harsh chemicals or abrasive cleaners.
4. Plasti Dip Cracking or Spider Webbing
Cracking, often referred to as spider webbing, creates a web-like pattern of fine cracks on the Plasti Dip surface.
Possible Causes:
- Excessive Coat Thickness: Applying excessively thick coats can trap solvents and prevent proper drying, leading to cracking.
- Insufficient Drying Time: Not allowing sufficient drying time between coats can also cause cracking as the solvents become trapped.
Solutions:
- Even Coats: Apply multiple thin coats of Plasti Dip, allowing adequate drying time between each coat, rather than a few thick coats.
- Patience is Key: Follow the recommended drying time on the Plasti Dip instructions. Rushing the drying process can lead to cracking.
5. Plasti Dip Lifting After Washing
If you notice the Plasti Dip lifting or bubbling after washing your car, it’s a sign of poor adhesion.
Possible Causes:
- High-Pressure Washers: The force of a high-pressure washer can be too strong for Plasti Dip and cause it to lift.
- Improper Washing Technique: Using a scrubbing motion or harsh sponges can also lift the edges of the Plasti Dip.
Solutions:
- Avoid High-Pressure Washers: Wash your car by hand using a gentle stream of water from a garden hose.
- Gentle Washing Technique: Use a soft microfiber mitt and a gentle back-and-forth motion to wash the Plasti Dip. Avoid scrubbing or using excessive force.
Seeking Expert Help
While many Plasti Dip car problems can be solved with DIY solutions, some situations may require professional help. If you’re facing persistent issues with your Plasti Dip or are unsure about tackling a problem yourself, don’t hesitate to seek assistance from experienced professionals. They have the knowledge and tools to diagnose and address any Plasti Dip-related issues effectively.
Frequently Asked Questions
1. Can I apply Plasti Dip over existing paint?
Yes, Plasti Dip can be applied over existing paint as long as the surface is clean, dry, and free of any contaminants.
2. How long does it take for Plasti Dip to fully cure?
Plasti Dip typically takes about four hours to dry to the touch, but it needs up to 24 hours to fully cure.
3. Can I remove Plasti Dip myself?
Yes, Plasti Dip is designed to be removable. You can peel it off by hand once it’s cured. If you encounter any difficulties, you can use a Plasti Dip remover or a pressure washer to assist with the removal process.
4. How do I fix small imperfections in Plasti Dip?
You can easily fix small imperfections by applying a light coat of Plasti Dip over the affected area.
5. Can I wax or polish Plasti Dip?
It’s not recommended to use traditional car wax or polish on Plasti Dip as it can damage the finish. Instead, use products specifically designed for Plasti Dip.
By understanding the common problems and their solutions, you can confidently tackle any Plasti Dip car projects and achieve a professional-looking finish. Remember, proper surface preparation and application techniques are crucial for long-lasting and flawless results. For further assistance or expert advice, feel free to contact AutoTipPro at +1 (641) 206-8880 or visit our office located at 500 N St Mary’s St, San Antonio, TX 78205, United States. We’re here to help you keep your car looking its best!


Leave a Reply